Track Android 17 updates for Samsung, Pixel, OnePlus, Nothing, and Motorola phones. Check eligibility, rollout status, and what to do before upgrading.
Celebrity investor Kevin O’Leary’s Wonder Valley data center plans are under scrutiny
The Sturgeon Lake Cree Nation (SLCN) has filed for a judicial review over the project, which is planned to be the world’s largest data center
A physicist hired by the SLCN has declared the data center will release significant heat waste
A physicist acting on behalf of the Sturgeon Lake Cree Nation (SLCN) has claimed that the O’Leary Digital Wonder Valley data center would release “23 atomic bombs of energy” while adding that the declaration is “a first-order estimate intended to convey scale.”
The report by Utah State University physicist Robert Davies, working on behalf of the SLCN, whose lawyer, also adds that current regulations for developing land are not suited to projects of the data center’s scale.
O’Leary Digital Wonder Valley, plans for which were first unveiled in 2024, was conceived to be the largest on the planet when completed, and has a $70 billion budget for the 64 square kilometer (almost 15815 acres) development. Its planned location is in the SLCN’s traditional territory in Alberta, Canada.
First-order estimate
The planned scale of the data center, earmarked for a location 130 km southwest of the SLCN’s reserve, is the main point of contention, and the basis for Professor Robert Davies, of the Utah State University.
But his claim over the “23 atomic bombs of energy” demands some clarification.
“Now of course, that’s not explosions, but that’s just trying to get a sense of how much energy we’re talking about,” said Davies in the assessment. “The effect will almost certainly be large, if not extreme.”
He also notes that “every quantitative figure … should be treated as a first-order estimate intended to convey scale, to be confirmed against the developer’s own filings.”
Davies also highlights that the project could be “the largest single-site heat source on the entire planet.”
The assessment, which was prepared for SLCN’s case, emphasizes that it is “not a comprehensive environmental review, a formal expert report, or a legal opinion.”
Robust regulatory process
While Davies’ contribution to the SLCN’s judicial review filing relies on further information from O’Leary Digital, it paints a worrying picture, not least into the effects of the heat waste on the surrounding wildlife.
“I can’t imagine allowing it to go forward without those full assessments,” Davies said, while also criticizing the use of traditional environmental legislation and guidelines for giant data center projects. “When people talk about environmental regulations that these projects have to adhere to, those regulations were not created with anything of this scale in mind.”
Naturally, O’Leary Digital has responded to the filing. CEO Paul Palandjian wrote in an email “We also respect the robust and stringent regulatory process we must follow in advancing Wonder Valley… we’re having productive dialogue with Indigenous communities through consultation and engagement, and we remain committed to that work.”
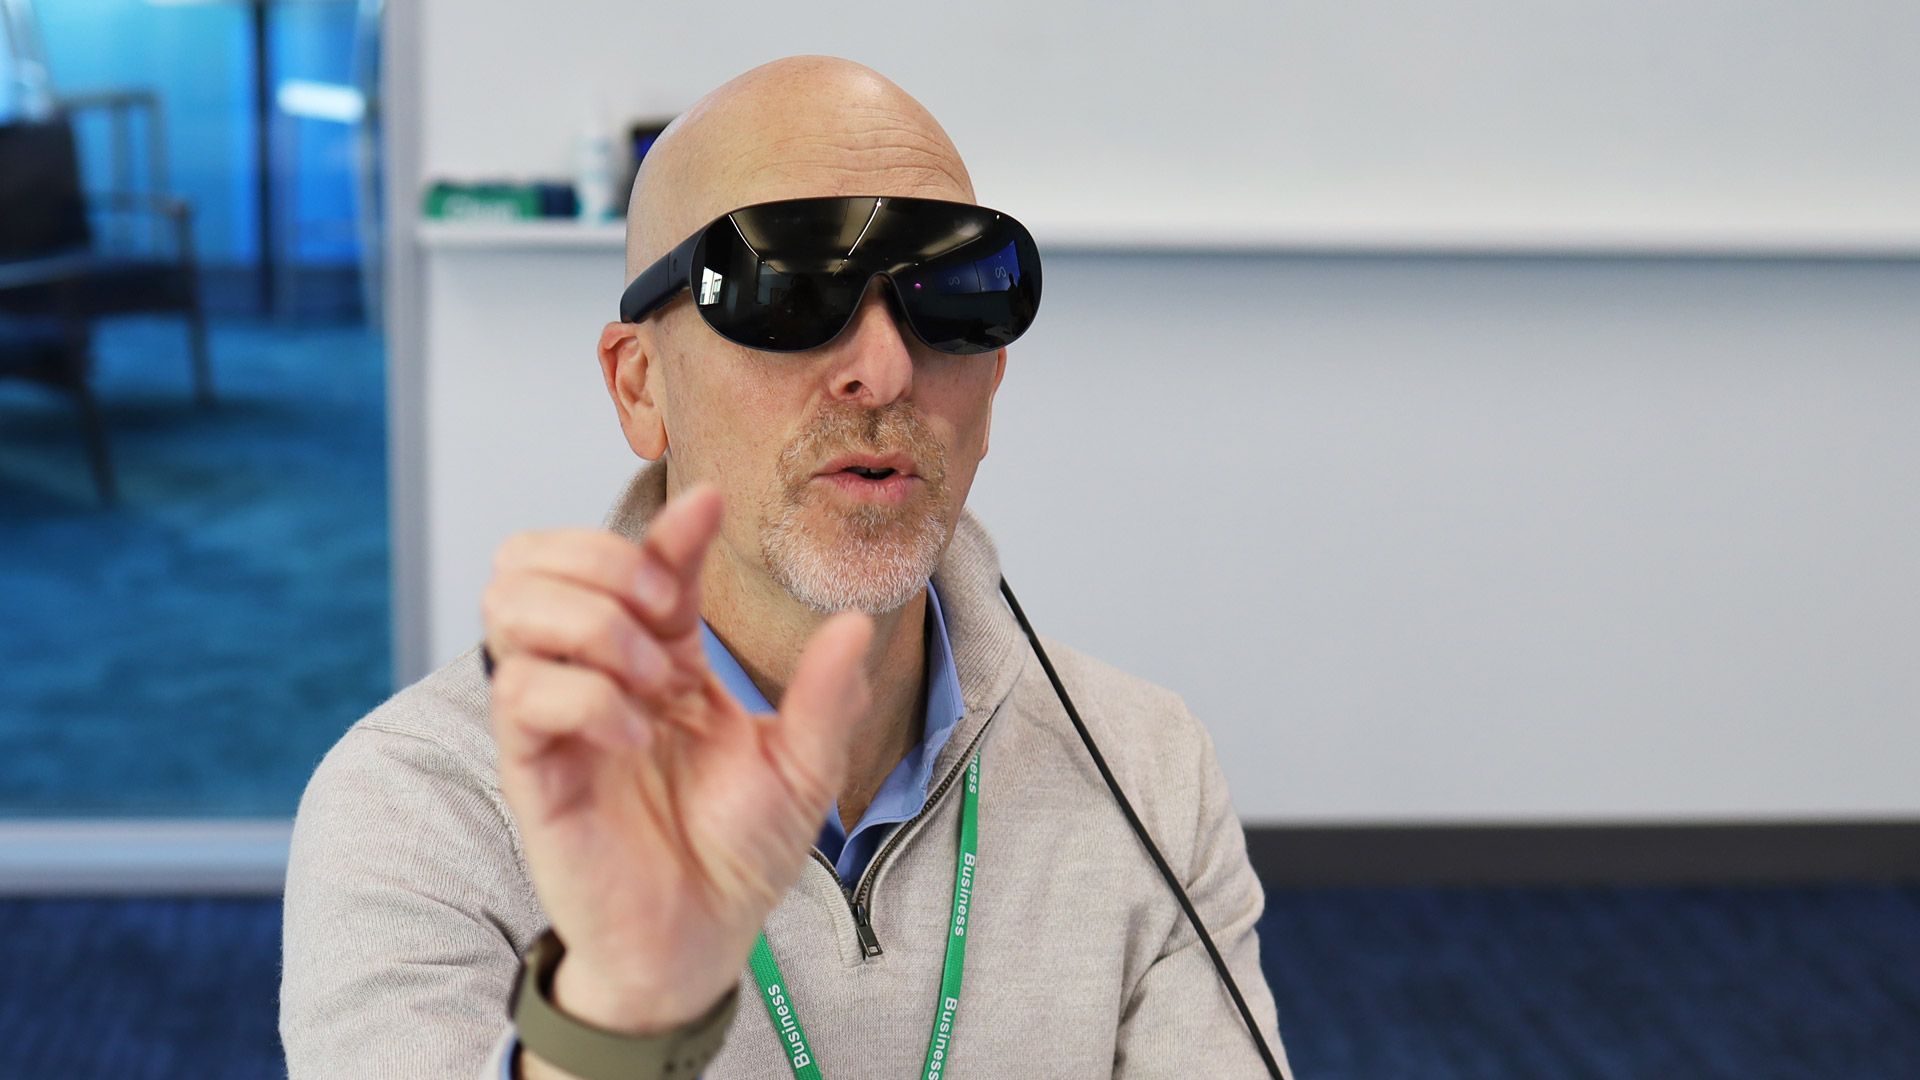
Experience counts for something, and nowhere is that more evident than on the Meta VR Glasses I finally wore this morning.
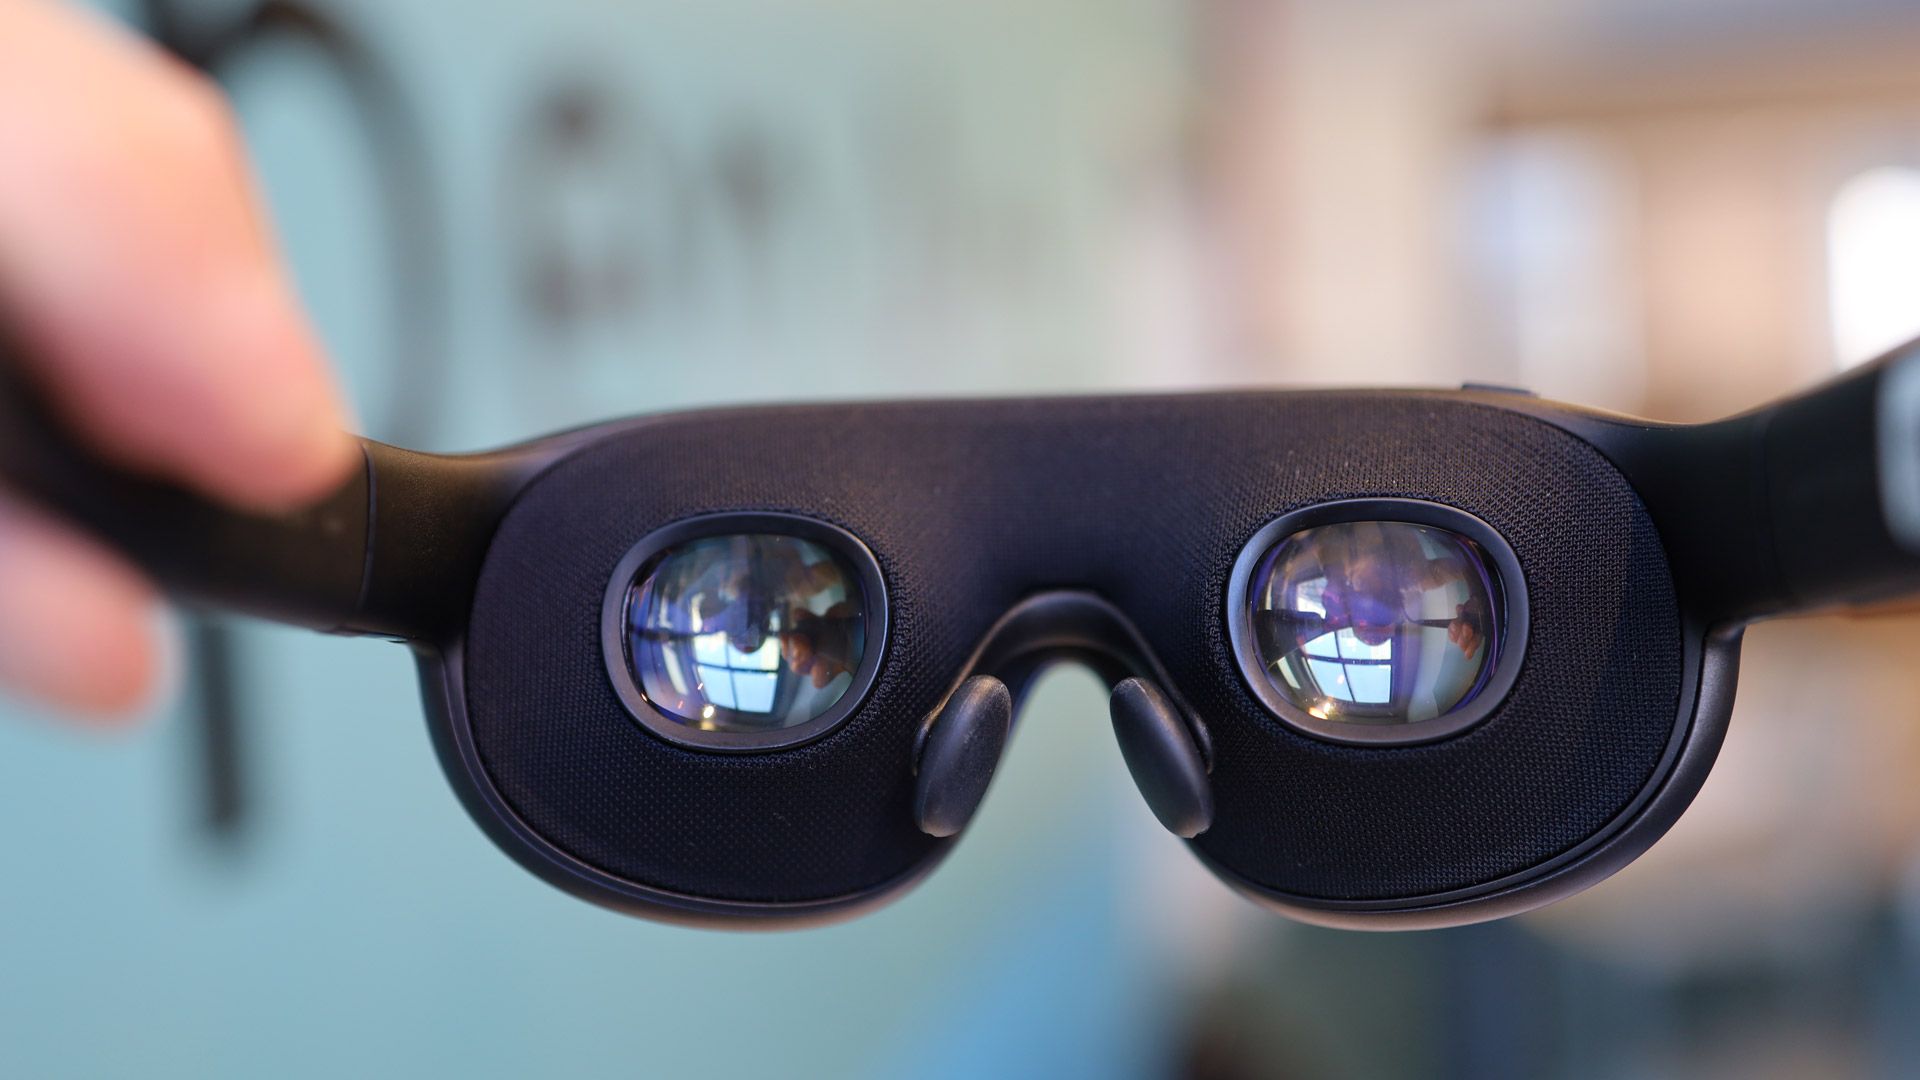
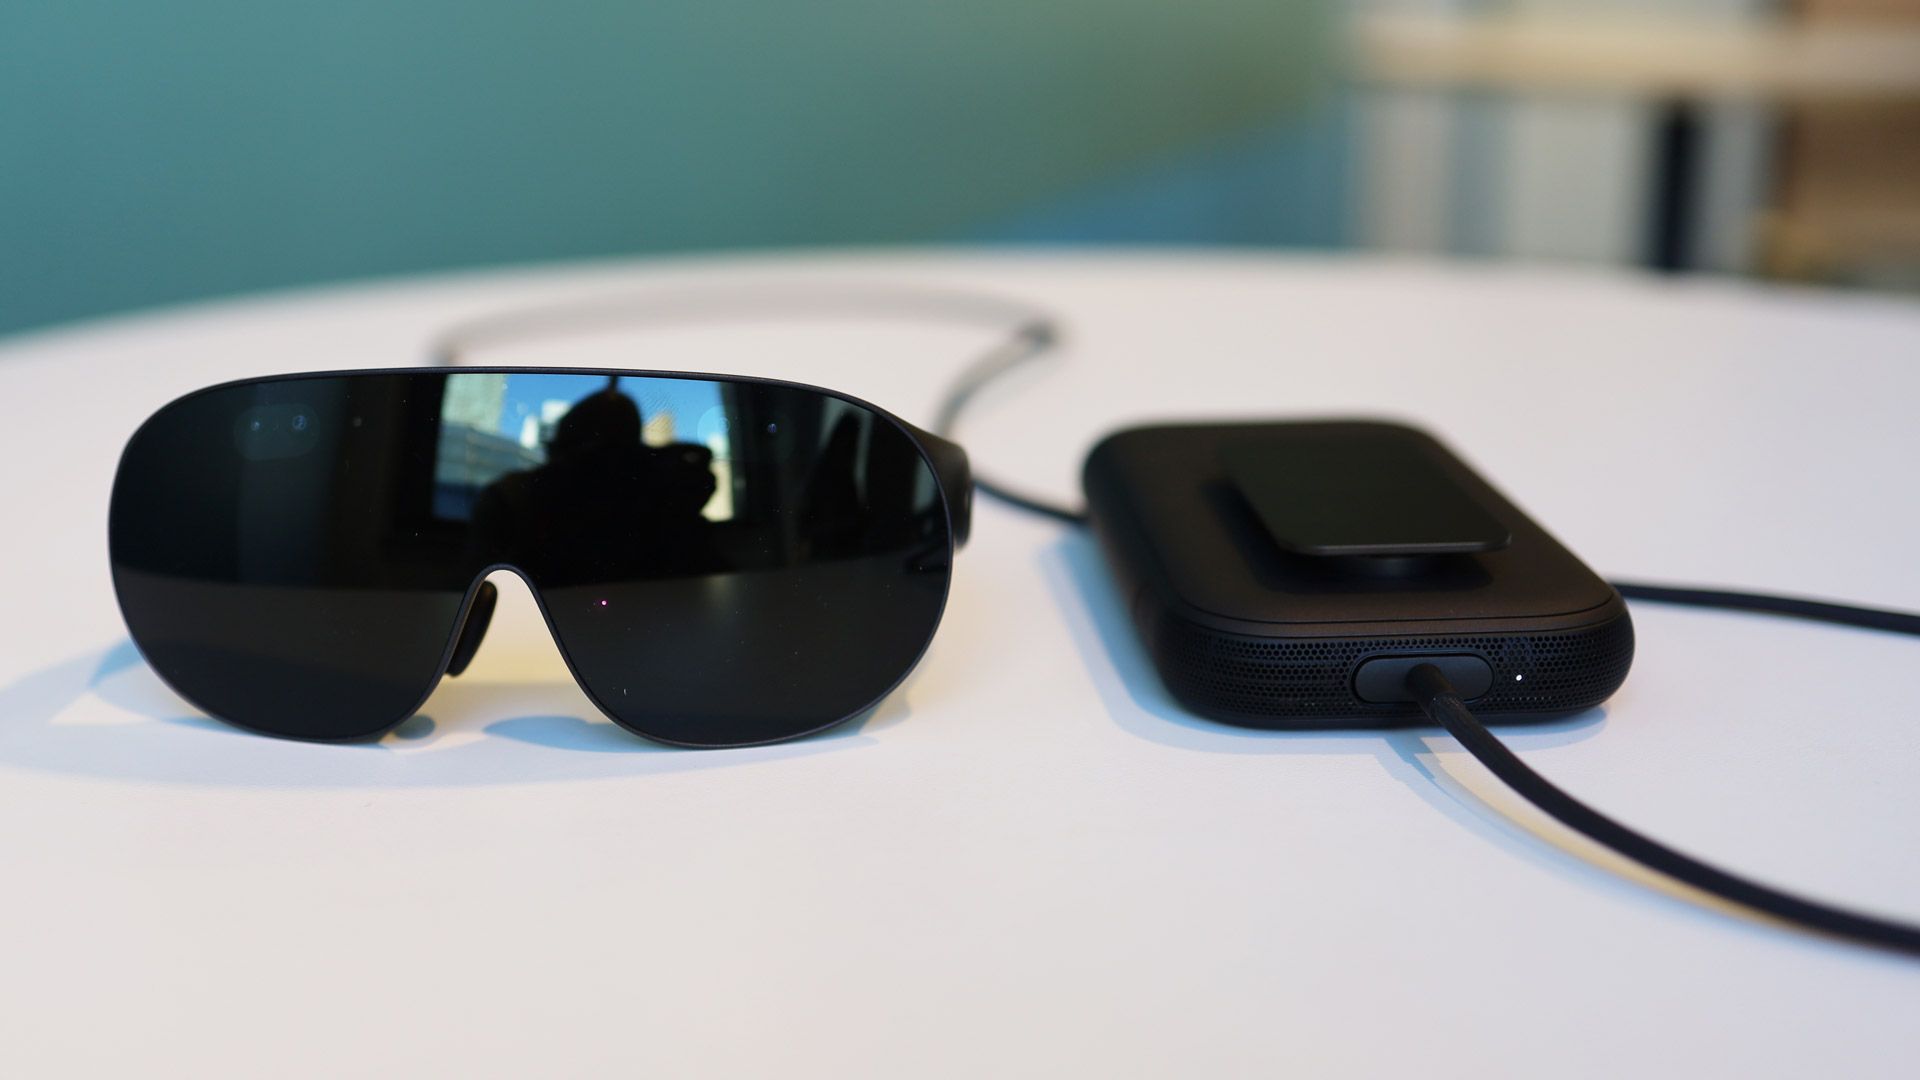
These lightweight, intuitive, and engrossing VR glasses shed the weight and overdesigned fussiness of previous VR and mixed reality headsets to deliver a subtle, smart, eminently comfortable and fun wearable experience that is equally at home entertaining you with wild VR movies or expansive, productivity-enhancing virtual desktops.
Granted, my walkthrough of the $1,299 VR Glasses that are expected to arrive next spring (April-early June) of next year was a breezy 45 minutes, but that was ample time to realize that Meta VR Glasses were truly built on all the lessons of not only Meta Quest VR, but also by watching competitors like Apple and even Samsung struggle to inspire consumers with stunning but also expensive or somewhat unwieldy mixed reality experiences.
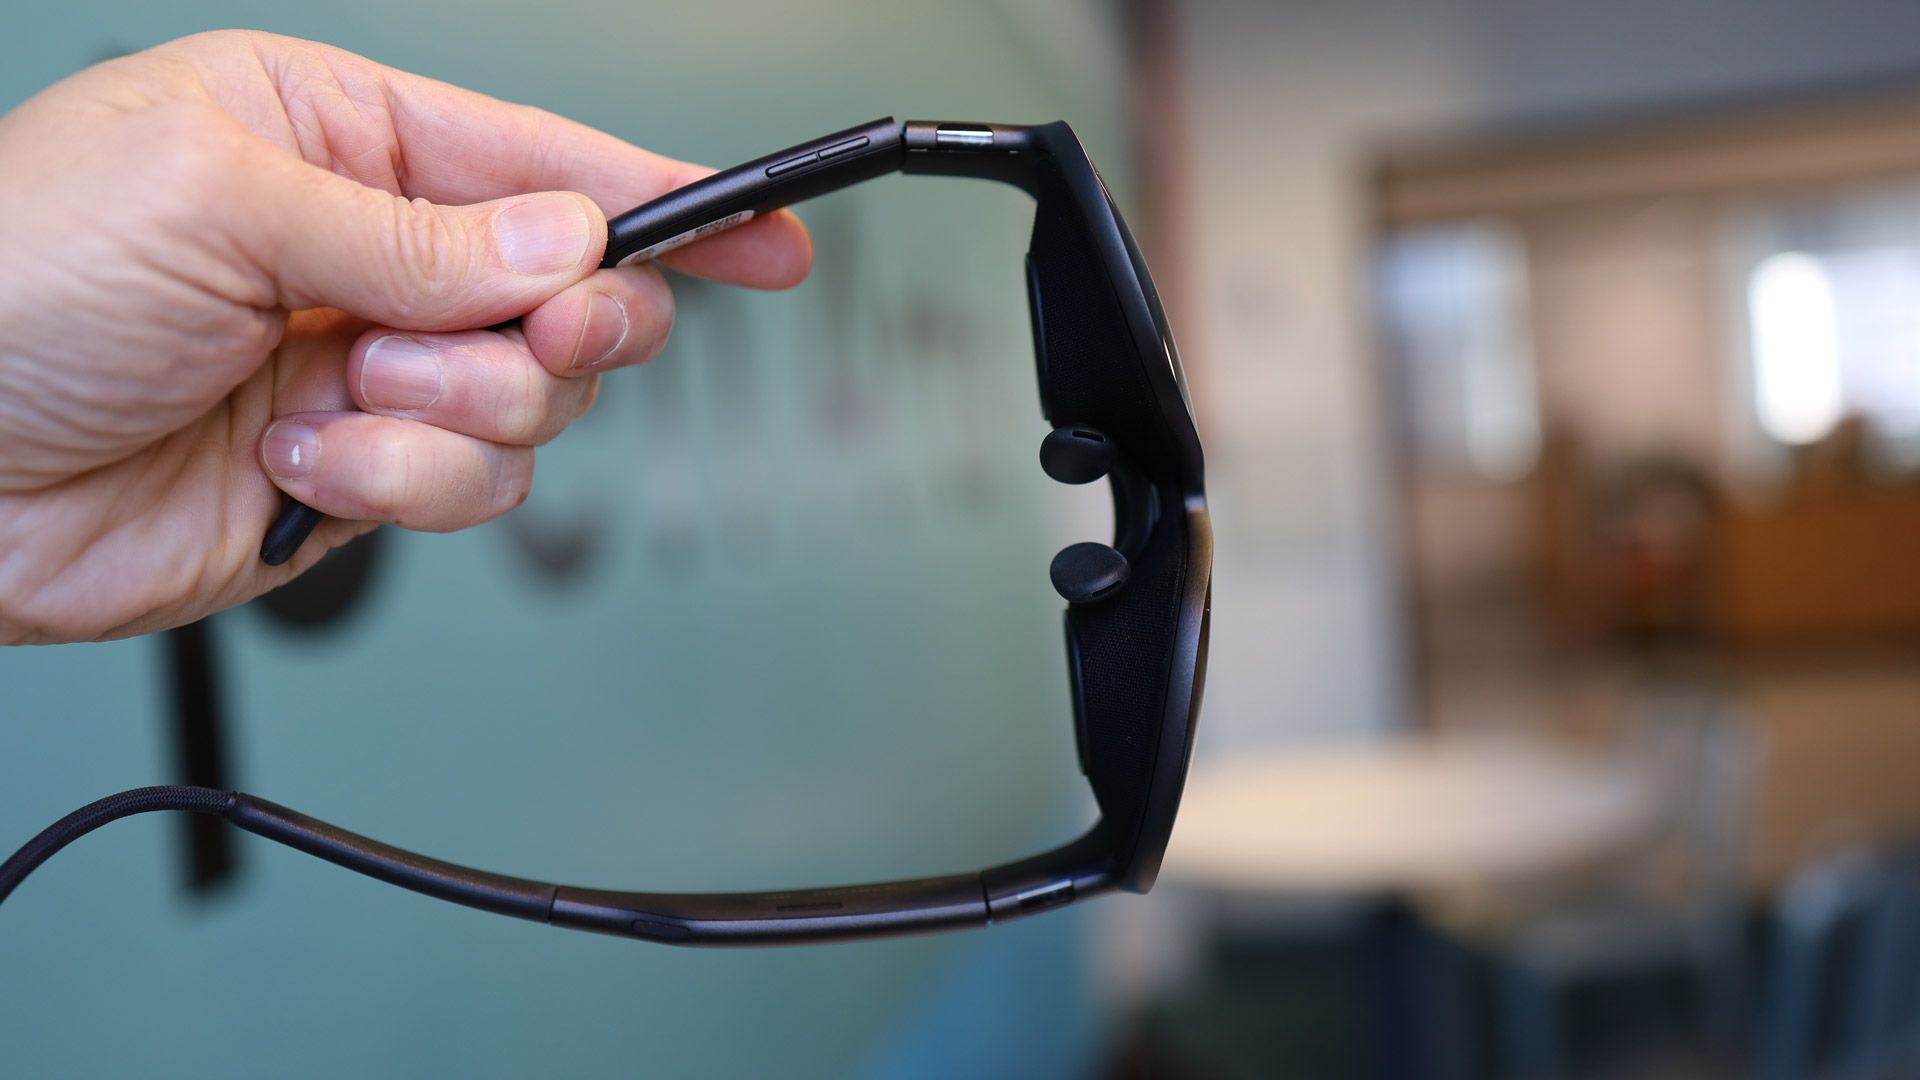
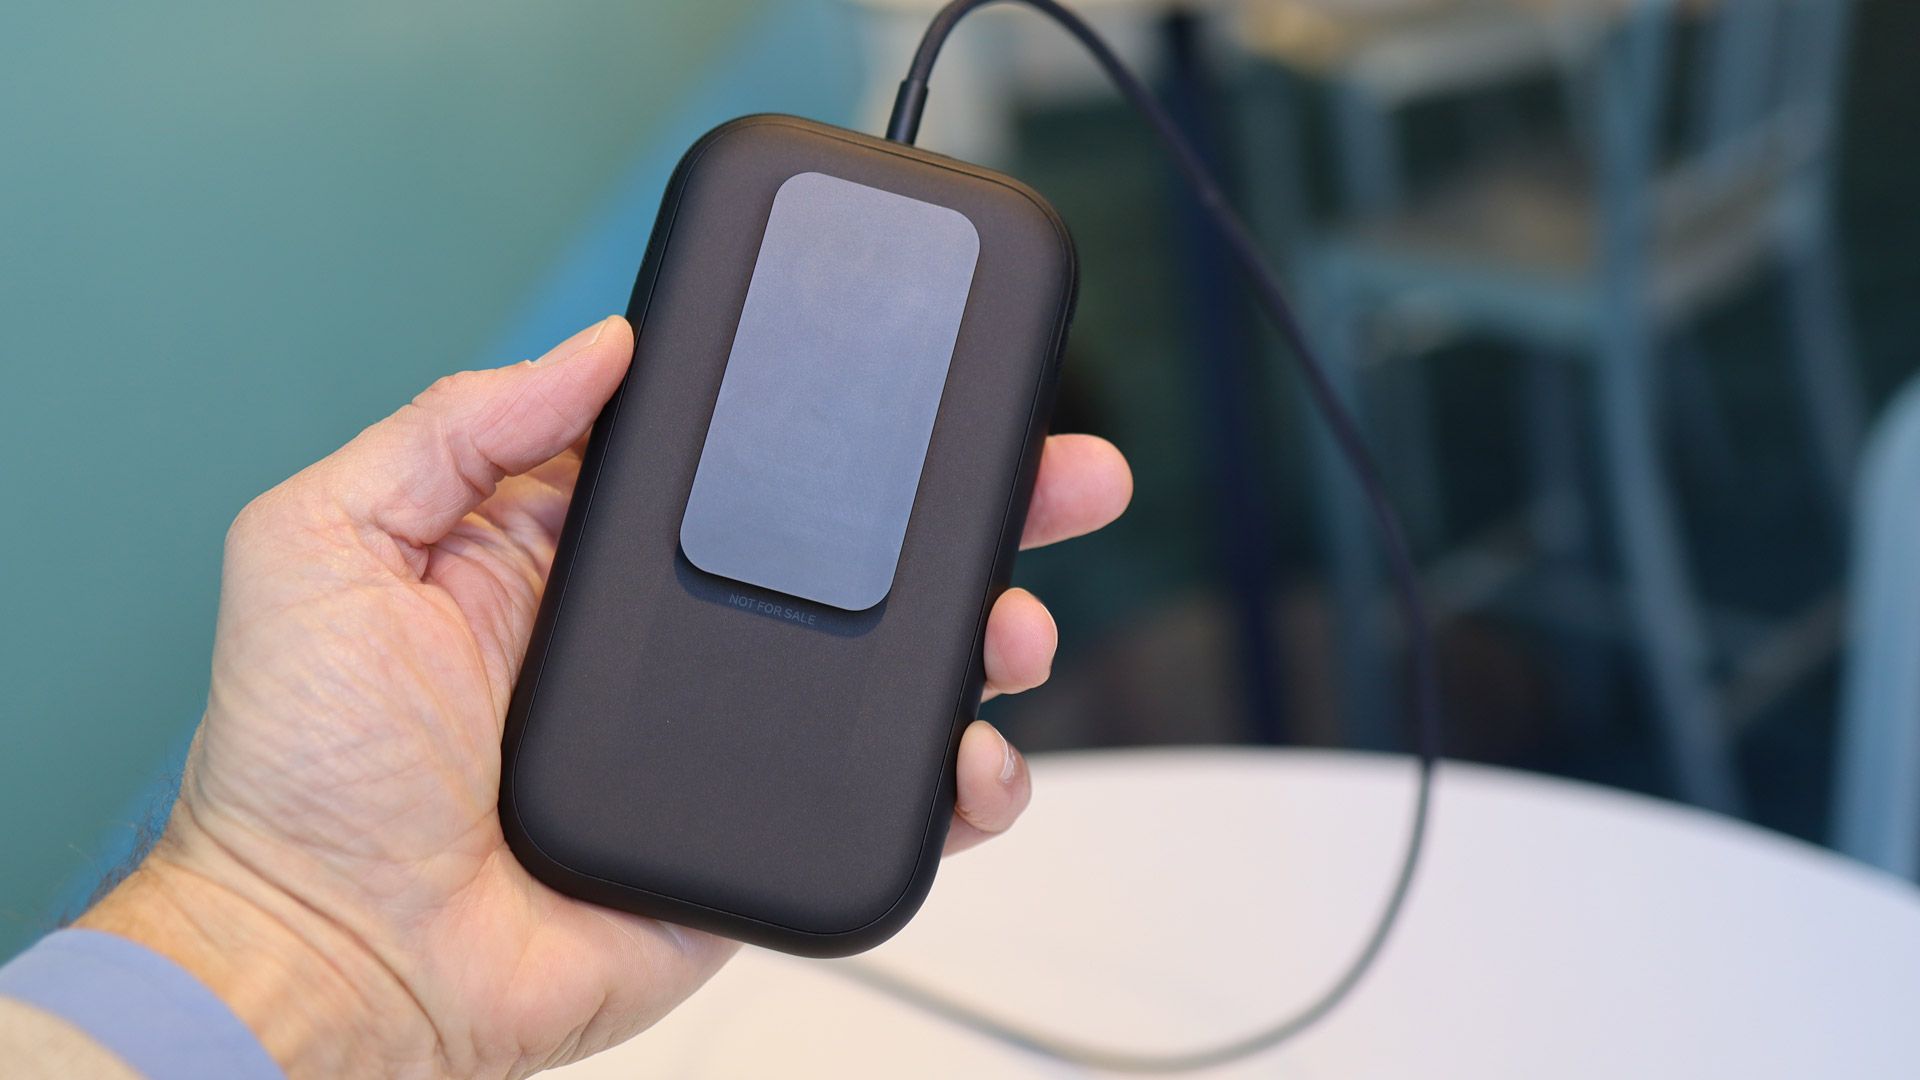
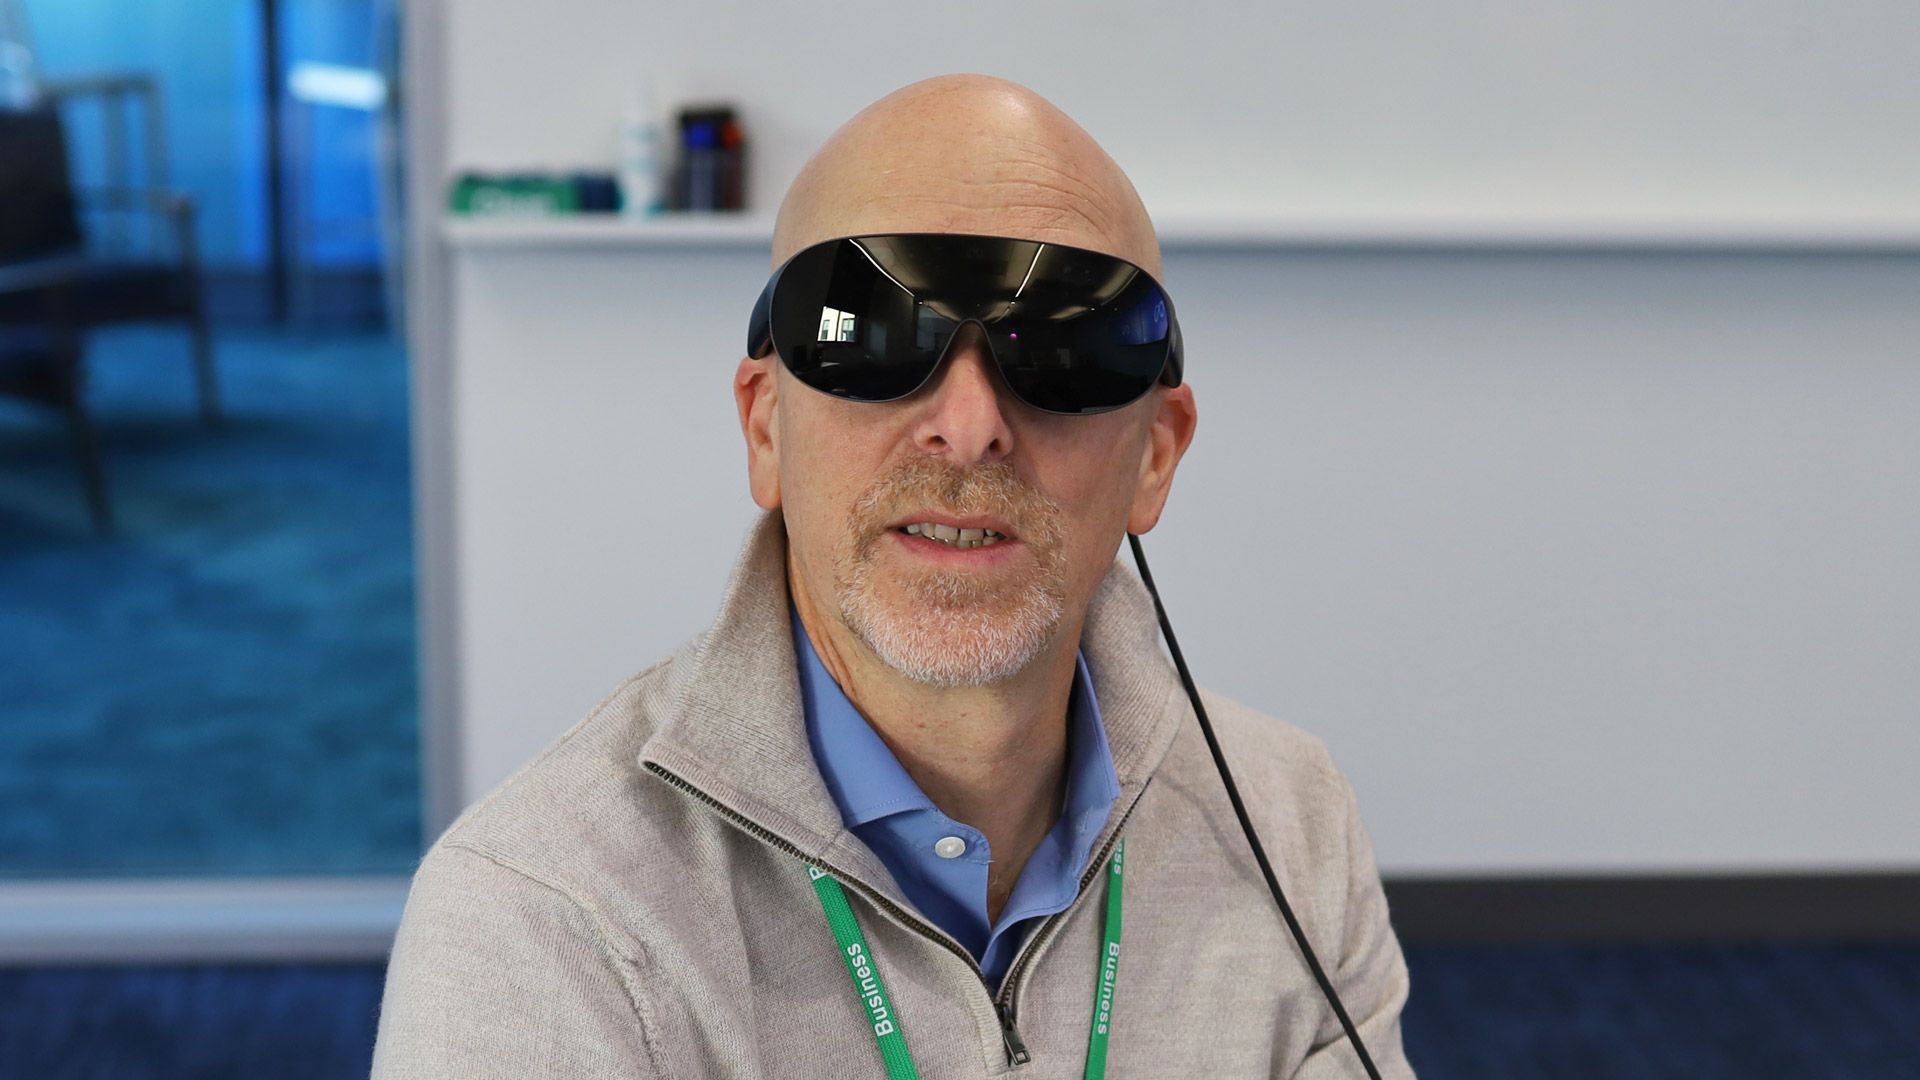
In my view, Meta’s decision to move compute, storage, and battery out of the headset and into a 300g belt- or pocket-friendly puck pays design dividends. The wearable, which looks like a slightly oversized pair of sunglasses, is so comfortable that I barely felt them on my face, and after 45 minutes of continuous use, I didn’t remove the 100-gram frames with a sense of relief. If anything, I was sad my all-too-brief interlude was over.
Without needing to support CPUs, GPUs, NPUs, RAM, a heavy battery, or even SD storage, Meta could focus on basic aesthetic appeal. The Meta VR Glasses feel and look spare, but in a positive way. By design, they do not cut you off from the outside world (there will be an optional light shield), so there’s no need to slap a pair of animated blinking eyes on the lenses.
Granted, I had my doubts that the Meta VR Glasses would be all that immersive or inspiring, given what looked like essentially eye-sized lenses and no visible cameras, inside or out.
That all turned out to be deceiving.
Accurate tracking for an immersive experience
(Image credit: Lance Ulanoff / Future)
When I said Meta clearly learned from all that came before it, I wasn’t kidding. The metaphors for setting up eye tracking were essentially the same as what I did for Apple Vision Pro (I didn’t have to adjust pupillary distance, though you easily can) and, to an extent, Galaxy XR. You look at a circle of dots floating in space and, yes, use your fingers to pinch and select each one.
There are, obviously, cameras that track your eyes, hands, and the outside world. I was impressed with the accuracy, which matched what I’ve experienced on Vision Pro.
Equally, the first time I saw the floating menu, I was shocked at the visual quality (it’s worth noting that Meta put in a pair of magnetic prescription inserts to match my eyes, and those inserts will probably add $150 to your final cost). For the record, Meta lists the Micro-OLED display resolution as 5K, and based on what I saw, I believe it.
Disney+, a TV App, Avengers: Infinity War VR experience, and a dozen other app icons floated in space, with each one puffing up as I glanced at it.
(Image credit: Lance Ulanoff / Future)
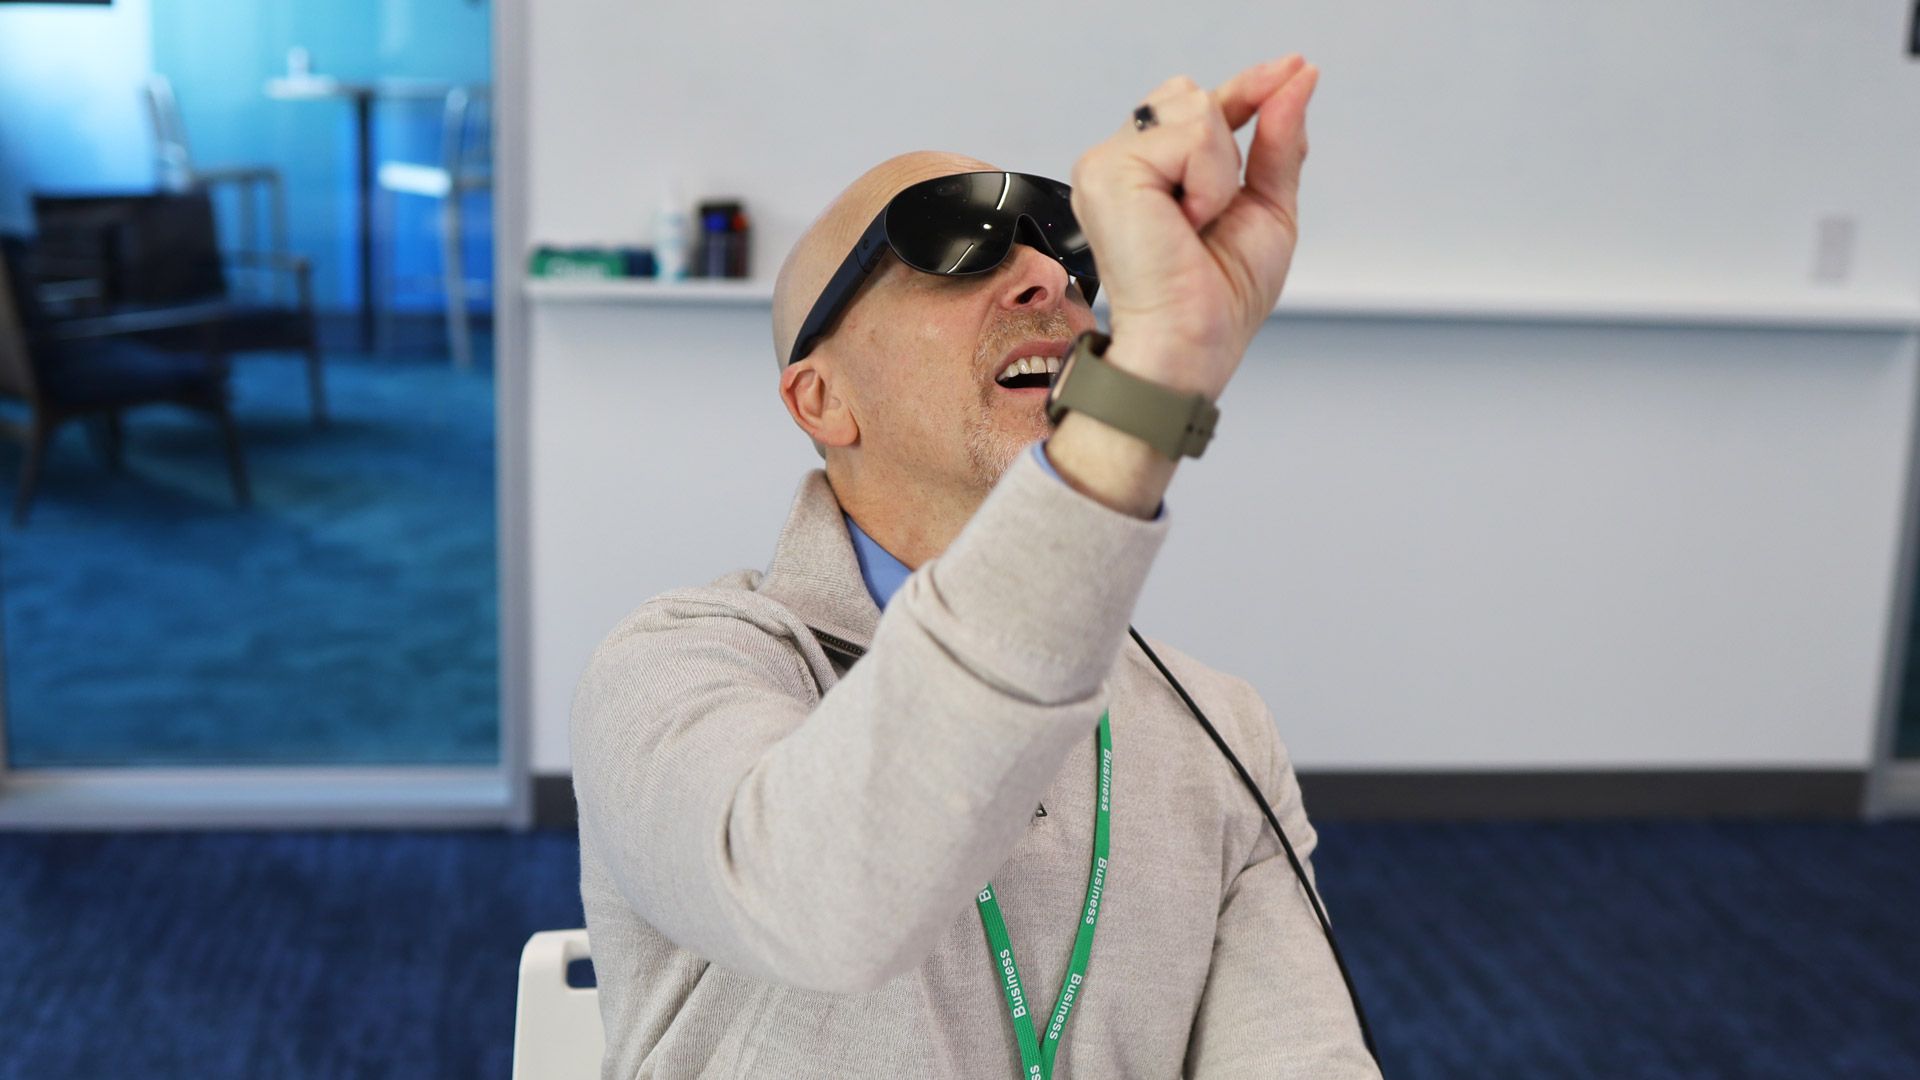
Meta VR Glasses software doesn’t try to reinvent the mixed reality wheel. I had no trouble opening apps, closing them, or even moving windows around. It does add one gesture that I appreciated: scroll.
To scroll in any window, I made a gentle fist and then swiped my thumb across the side of my index finger to scroll left, right, up, and down. I was surprised at how quickly I picked this up; I think that has a lot to do with the accuracy of the eye and gesture tracking.
My experiences were limited to a handful of apps, but each one was compelling in its own way.
(Image credit: Meta)
We started with an 8K VR Billie Eilish concert in which I was virtually seated front and center, close enough to take a selfie with the singer. The volume started a bit low for my tastes. Still, I was able to use the volume controls under the right temple to make the audio loud enough that it drowned out the voices of the Meta execs who were trying to guide me (they were watching what I viewed through a cast on a nearby PC — Meta VR Glasses can also cast to your phone).
We switched to the NBA Finals last, title-clinching Knicks game, which put me courtside. At one point, I realized the near-360 view was probably shot by a camera that was also almost on the court. Meta told me they partner with Kosmo (Hesai Kosmo), which uses relatively small 360-degree cameras to capture the action. As the game replay continued, I noticed Timothée Chalamet and Kylie Kardashian were also courtside. I waved, but they did not seem to notice me.
I played a puzzle game called Dragon Grove, which, as you might expect, featured a small, green, cartoony dragon who landed on my outstretched hand and let me pet him. I was reminded of a similar experience with Vision Pro and a butterfly. By launch, Meta expects to have 75+ hands-first games.
(Image credit: Meta)
Meta believes that the primary use cases for Meta VR Glasses will be entertainment and productivity. On the entertainment front, I watched Avengers Infinity Wars VR Enhanced, which took the original film and then gussied it up with 360 surround VR imagery and even lets some of the characters pop out of the original film frame. It was cool but also a bit odd. Why would a director who intentionally chooses to shoot a scene a certain way want you looking anywhere else but his original film? It did, though, make the movie feel more like an amusement park ride, which may appeal to some.
(Image credit: Meta)
Business class
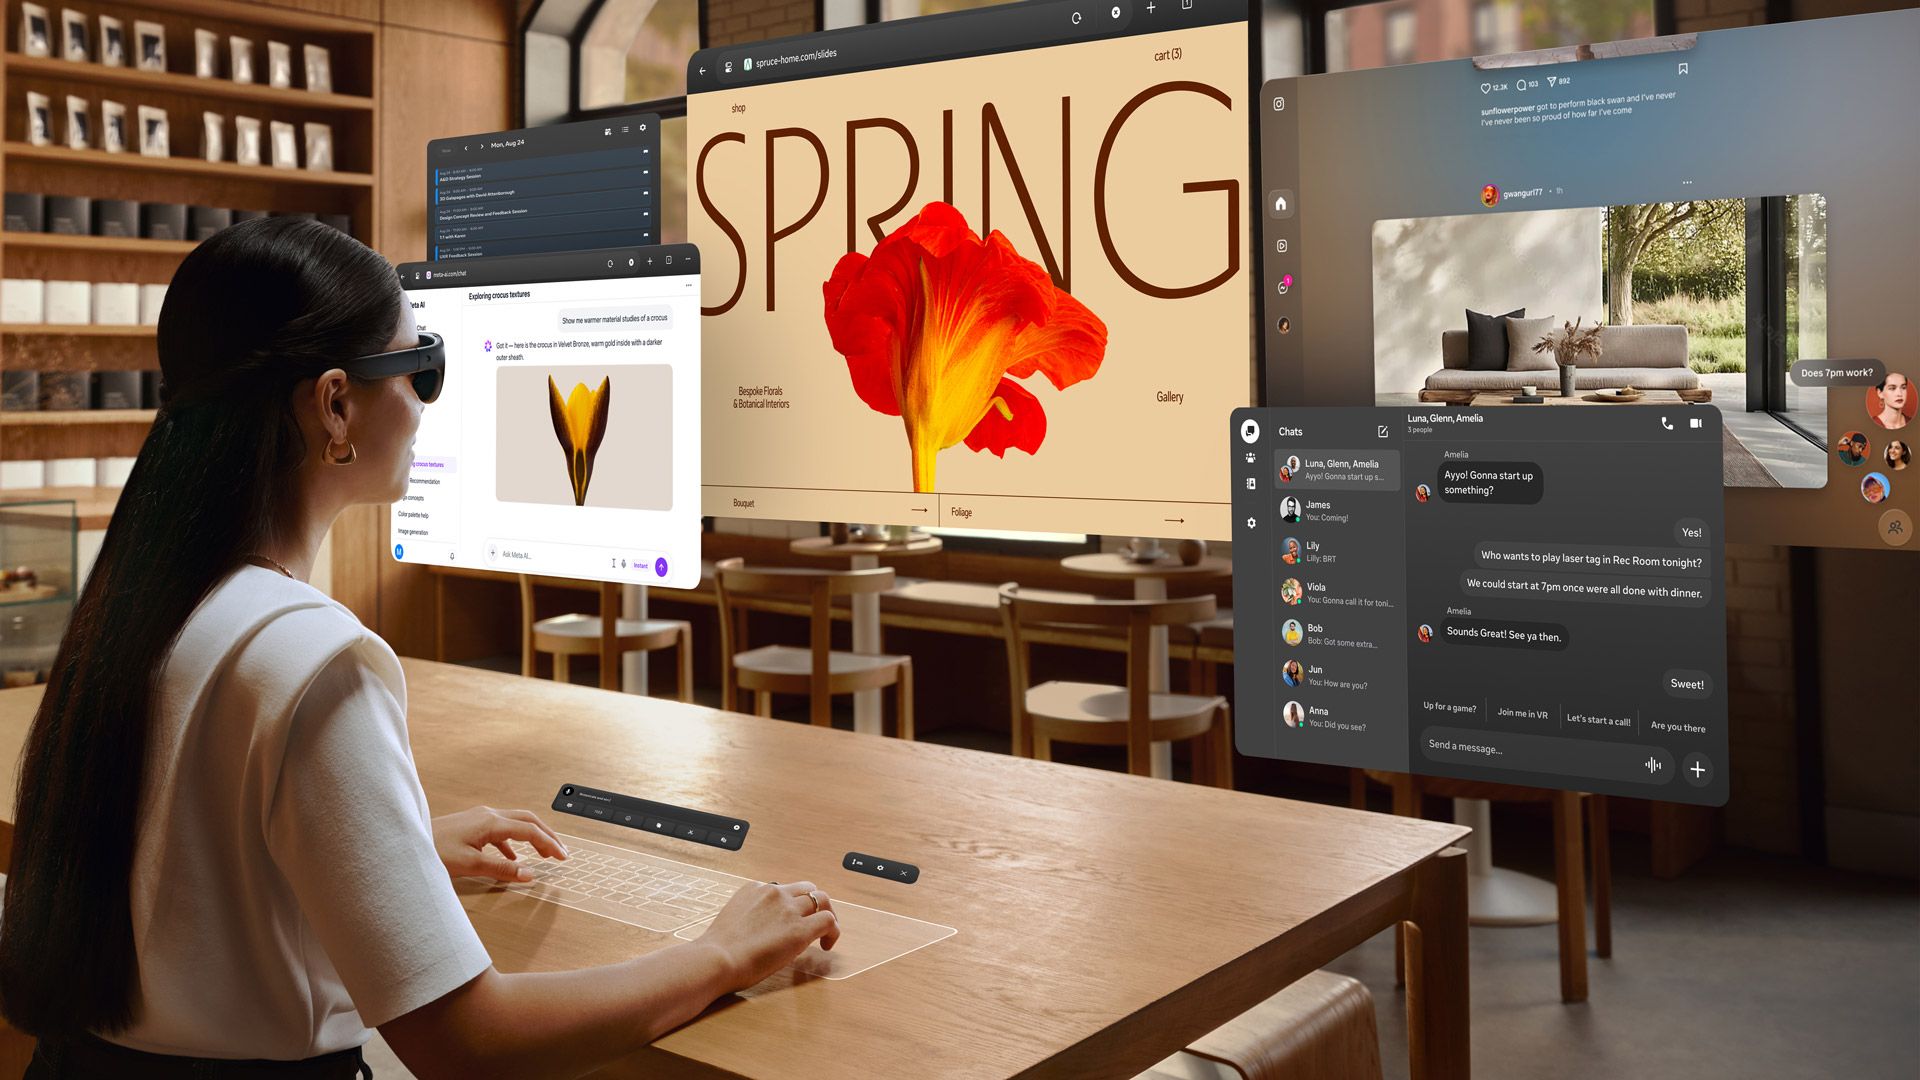
On the productivity front, Meta VR Glasses basically start where everyone else spent years traveling to arrive. I had huge desktop screens all around me that I could move and resize with gestures. At one point, I placed a screen on the ceiling above me. Plus, I could take any screen and make it ultrawide. The only hiccup was when one coding screen stretched the code text into an ultra-wide, almost unreadable format. This is all pre-release software, so bugs like this are to be expected.
Like Vision Pro and Galaxy XR, Meta VR glasses have a floating keyboard, but they’ve also added something new to the mix: a surface keyboard. To enable it, I selected the option from the floating keyboard and then put my hands on the table surface. After a quick scan, a transparent keyboard and trackpad appeared on the tabletop. I could use them just as I would any standard physical keyboard and mouse. My only issue is that, as a terrible touch typist, the lack of any physical key response might make my typing even worse.
(Image credit: Meta)
When I took off the frames, it felt like I’d removed a pair of glasses, not headgear doing its best with straps and head rings to lessen the load on my face. There was no afterburn on my nose or brows.
I do, of course, have questions. Like, even at the more affordable $1,299, will consumers buy into this for a big-screen experience on an airplane and when they’re home alone (you won’t sit next to a family member and tune out to your own VR experience, will you?). Gamers, especially those who are tired of wearing heavy headsets, will surely be interested in Meta VR Glasses, though I don’t know if the Qualcomm Snapdragon Reality Elite processor (XR2 Gen 3), which can supposedly support all the apps in Quest’s library, has the juice to run true AAA titles. I’m glad Meta has the productivity part worked out because I still think that may be the best play for any of these types of wearables: knowledge workers, business travelers, and enterprise.
Who knows, though, maybe Meta VR Glasses is the mixed reality headset to finally break open the consumer market. It impressed me and, to be honest, I can’t wait to wear them again.
Nintendo officially increased the price of its Switch 2 console in September from AU$699.95 to AU$769.95 due to “various market conditions”, no doubt caused by increasing component costs driven by AI-driven shortages.
If you missed out before the price increased, and now feel the new price has put you off from buying a Switch 2, I don’t blame you — but if you also happen to be in the market for a new smartphone, then have I found the deal for you.
For a limited time, JB Hi-Fi is throwing in a free Nintendo Switch 2 with every purchase of either a Google Pixel 11 Pro or Pro XL handset, a saving of AU$769.95!
JB Hi-Fi is adding a bonus Nintendo Switch 2 console when you buy either a Google Pixel 11 Pro or Pro XL handset, starting today, October 29, and running until November 9. You can save even more by trading in your old phone for a JB Hi-Fi gift card that goes toward your entire purchase, and you can get a quote here. Also included are a 3-month YouTube Premium subscription and six months of Google AI Pro. In case you need to return either phone, you’ll need to also return the Switch 2 console.View Deal
I’ve not seen many discounts on the Switch 2 since its September price hike, and I’ve certainly never seen one being given away for free. That fact alone should give this deal plenty of appeal, but when you consider the recent game releases for the console, there’s plenty more to get excited about.
Yes, with a slew of first-party and exclusive releases from this year like Star Fox, Donkey Kong Bonanza, Pokémon Pokopia and more, as well as upcoming titles like Metroid Ravenous, Pokémon Winds and Waves and The Legend of Zelda: Ocarina of Time remake, you’re not exactly short of options for engaging gaming potential.
Our Nintendo Switch 2 review gave the console 4.5 stars, confidently claiming it to be a massive upgrade over its predecessor. The headline improvements include support for 4K and 1440p resolutions (vs up to 1080p), a 120Hz refresh rate (up from 60Hz) and overall performance improvements with an Nvidia Tegra T239 processor, 12GB of RAM (vs 4GB) and starting storage of 256GB.
And let’s not take the attention away from the Pixel phones included in this offer. The Google Pixel 11 Pro and Pixel 11 Pro XL each received 4 out of five stars in their respective reviews, with both delivering battery improvements and better AI performance from the new Tensor G6 chipset, improved cameras, brighter screens and lighter and slimmer chassis. The Pro XL has also earned a spot among the best phones you can buy in Australia.
Securing either of these top-performing devices on their own is always going to be a wise move. When you get one of them included for free, then it practically becomes a no-brainer.
The xTool X1 might initially look like another large, enclosed laser engraver, but it wasn’t long into my months-long test of the X1, to realise it’s something far more ambitious.
Essentially, xTool has brought years of laser engraving development together into a single, expandable manufacturing platform, making the X1 one of the most versatile machines I’ve ever reviewed. This is not the first machine that I’ve looked at recently to do the modular laser approach, with the superb Creality Falcon T1 doing something similar on a far smaller scale.
At the X1’s heart is a 55W CO₂ laser, similar to that seen in the excellent Bambu Lab R1 although now the larger X1 has arrived at the same price and with far more potential it will be interesting to see how the R1 fares.
Once again, the 55W CO₂ laser proves to be a powerful option for cutting and engraving wood, acrylic, and a wide variety of other materials. On its own, this one laser option would already make the X1 a superb option for anyone looking for a professional laser cutter.
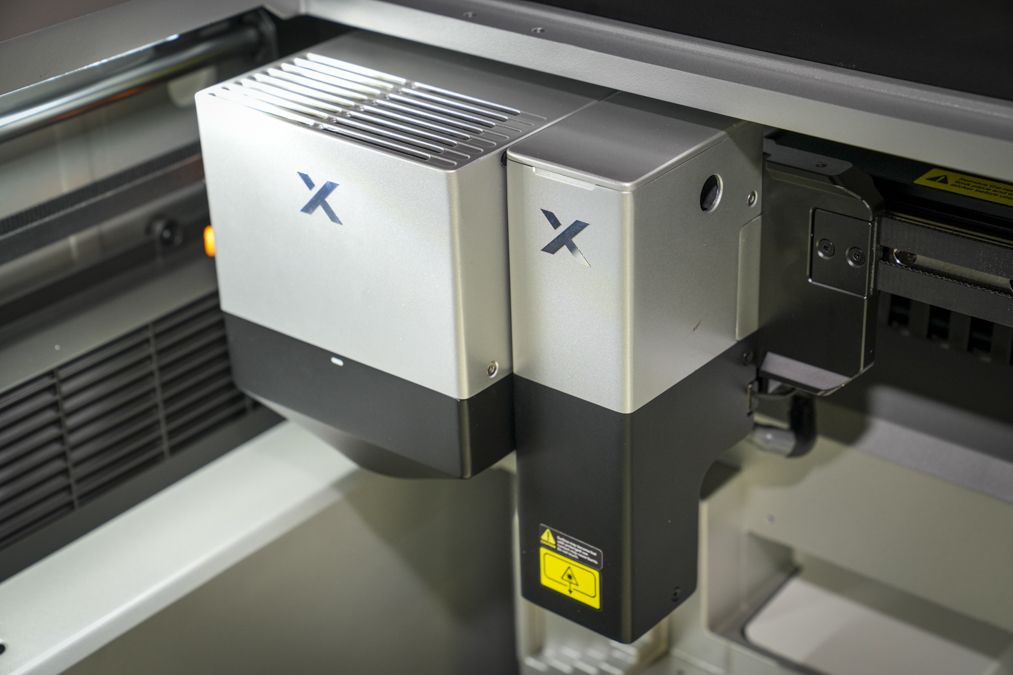
But then again, xTool already has the xTool P2. To differentiate this as something new, xTool has thrown all their technologies at the design and added an optional 20W diode galvo module, which sits alongside the CO₂ head inside the machine, and this forms the foundation of what this machine then develops into.
One of the key features to the dual head system is that rather than relying on a conventional moving-head laser for every cut, engrave, and score, the X1 can use the galvo system for intricate, high-speed engraving before switching to the CO₂ laser for cutting. What I like is that both are controlled through xTool Studio, and switching between the installed lasers just takes a selection option in the software.
Throughout testing, this combination of laser options with backpack modules also highlighted the potential and the direction these laser machines are moving. Multiple laser options mean projects like wooden placemats and detailed pencil boxes, which would ordinarily take considerable time to engrave and cut, can be completed much faster, with the galvo speeding through the detail while the CO₂ handles the cutting. In one test, a placemat project that took the xTool S1 around two hours was completed on the X1 in approximately half an hour.
One of the X1’s big features is its support for additional laser-source modules mounted on the rear of the machine. For this review, I used the 5W UV and 60W MOPA modules, which enabled me to engrave glass and emboss brass coins. I also used the MOPA for its accuracy to create precision apertures in thin metal for pinhole cameras.
Having previously used dedicated MOPA machines such as the xTool F2 Ultra, I was interested to see how a machine this size could perform similar metal engraving. The results were impressive, but as I found at every step of this review, there were a series of considerations due to the size, weight and complexity of the machine.
That first consideration is size. The X1 arrived in a substantial crate, and as it was dropped off in the driveway, I had to call on assistance from a neighbour to lift and manoeuvre it into position. Although the main machine can sit on a conventional workshop bench, the additional modules, extraction systems and accessories quickly highlighted that the space I had allocated was about half of what it should have been.
(Image credit: Alastair Jennings)
The second point to make is the modular system. While the additional laser sources proved excellent, swapping them isn’t quick, unlike some of the small multi-laser modular systems I have looked at recently.
With the X1 positioned against a wall, accessing the rear of the machine, changing the hardware, and recalibrating could take about an hour. Some of this was down to the restricted space in my workshop, but the swap of modules required the recalibration of the lasers, it’s worth considering if you intend to switch between different laser technologies regularly.
Price is another consideration although I’m actually surprised how cheap it is on balance. The base machine is listed at $3,699 / £2554, but adding the diode laser, specialist modules and accessories can take the complete system well beyond $10,000, depending on configuration.
Even so, there’s no getting away from how capable this machine is, and if you were looking for the equivalent in separate machines, say the P2 and F2 Ultra, you’d be looking at much the same costs. For general cutting, detailed engraving and small-batch production, the X1 is one of the most refined laser engravers I’ve used.
If you have an established workshop or small business handling a wide range of materials, the X1 offers huge potential. Just make sure you have the space, budget and patience to make the most of it.
xTool X1: Price & availability
The xTool X1 starts at $3,699 / £2,553 and includes the 55W CO₂ laser. The base price is in line with other machines that I have looked at recently. It’s worth knowing that the costs rise quickly with optional modules.
The 20W diode galvo at $899 / approx. £674 is an optional, but essential upgrade, as it first enables faster engraving but is also needed to support the installation of the additional UV, fibre and MOPA lasers.
A fully equipped system comes in at just under $10,000 if you buy the components separately as upgrades, however, the bundle offer prices bring the cost right down. The X1’s integrated workflow, versatility and all-in-one design do keep things neat. You can find out more at xTool.
X1 Single CO2 (55W CO2): $3,399 / £2,554
X1 CO2 + Diode Galvo (55W CO2 + 20W Diode Galvo Module): $3,999 / £3,005
Machine type: Modular laser cutting and engraving platform Primary laser: 55W CO₂, 10,600nm Optional lasers: 20W diode galvo, 5W UV, 30W fibre, 60W MOPA Laser technologies: Hybrid Motion and Laser Swap Working area: 615 × 320 mm x 150 maximum Dimensions: Weight: Camera and focusing: Dual cameras with image stitching, automatic focusing and height-adjustable bed Connectivity: USB and Wi-Fi Software: xTool Studio
There’s nothing particularly small or understated about the xTool X1. In fact, the first indication of what I was dealing with came when the machine arrived in a substantial wooden crate. I can usually handle these large machines with the help of a sack trolley and boxes.
However, this time I called on the help of a neighbor. It’s not quite the size of the P3, but you will still need two people to lift the X1 free of its packaging and to get it into position in the workshop. By the time we stripped away the protective materials and set it onto the work surface, it was obvious this wasn’t a typical desktop laser engraver.
The machine itself follows the same design direction as xTool’s recent P2S and P3 models, with a fully enclosed chassis and a level of refinement that feels far removed from the open-frame laser engravers that dominated the enthusiast market only a few years ago. When it comes to the size, it measures 1000×580×420 mm.
Having tested numerous xTool machines, I’ve consistently been impressed by the company’s build quality. While xTool and GlowForge used to be the two major players in this part of the market, rivals such as Bambu Lab, LaserPecker, and WeCreat have recently upped the game as well.
Everything from the large hinged lid to the internal processing bed feels solid and is exactly as I’d want in the workshop. The lid opens easily and is supported by pneumatic arms; on some machines of this size that I’ve looked at in the past, this can be a weak point, but here it all feels good and solid.
Compared with other machines of this type and size, the height of the machine is considerably taller; this is due to the adjustable bed inside that rises and lowers to position materials correctly beneath the laser. This is a far more sophisticated setup than the fixed-height beds on many smaller machines that require risers for larger objects. On the front of the machine, there are a couple of buttons that enable you to raise and lower the bed manually if needed.
Testing showed the bed adjustment was essentially fully automated, with the software handling most positioning. The work area is big, with a maximum of 615 × 320 mm, and offers plenty of room to lay out multiple parts, which is especially useful for small batches of products such as placemats.
What I quickly realised is that depending on the laser and type of work you’re doing, those work area dimensions change. For instance, with the CO2 laser the max height of anything placed into the machine is 150mm; however, with the other lasers that reduces to 140mm. Essentially, as you lay out your designs and select the lasers, the on-screen layout changes so visually that from the outset you know exactly where you are.
Inside, the materials are supported on the supplied slats, though as with other manufacturers, I would have liked a few more. I also had the optional honeycomb panel, which, as ever, became my preferred choice for almost everything I processed.
A honeycomb just provides a decent surface for supporting materials and makes it easier to remove completed work, and while small pieces of debris from the cuts will still fall through to the base, there’s less chance of scorching of cut pieces falling and accidentally getting re-lasered.
Unfortunately, one surprise was that there isn’t a simple removable waste tray at the base, so cleaning out smaller pieces requires a little more effort. I have a handheld Dyson for this exact job, and with the depth and space, it’s easy enough to get that into cleanup quickly after a few cuts.
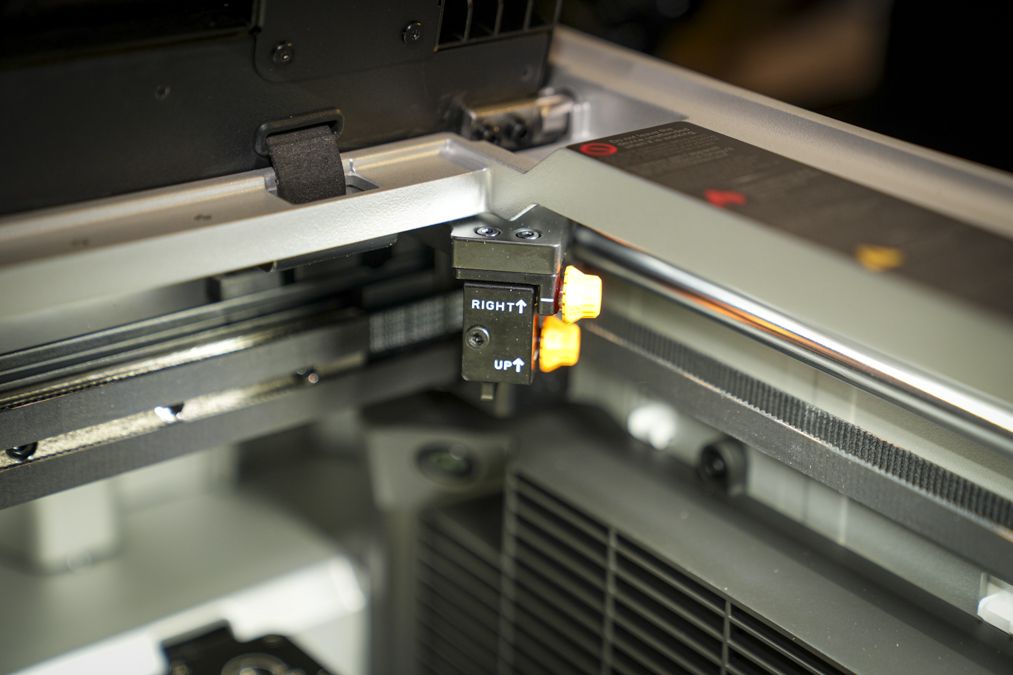
In this review, alongside the 55W CO2, I have also installed the 20W diode galvo module. This sits alongside the CO₂ laser inside the main enclosure and takes a couple of minutes to fit; once installed, it can stay as a permanent part of the machine. After installation, the rest of the setup is completed in xTool Studio.
The software walks you through the calibration process, although some manual adjustment is needed to ensure that the laser paths are correctly aligned. I’ve encountered this with previous xTool machines, including the P2 and P3, and while it can take a little time to understand, the process is reasonably straightforward once you’ve done it a few times.
My first test didn’t produce the result I expected because the alignment wasn’t quite right, mainly due to me rushing part of the process. After repeating the calibration more carefully, the results vastly improved, and once everything was configured, the two installed laser systems are remarkably easy to use.
To switch between the two in the xTool Studio software, you simply assign the right laser to the right operation, and the machine handles the transition. There’s no need to remove one laser head and install another manually as you would have had to do with multi-laser machines in the past.
For everyday cutting and engraving, this combination of lasers works incredibly well and vastly speeds up the process of engraving and cutting, which is the bulk of what I personally do with these machines.
However, these two lasers are just the start of the story, and things do become a little more complicated when I started to install and use the rear-mounted laser-source modules.
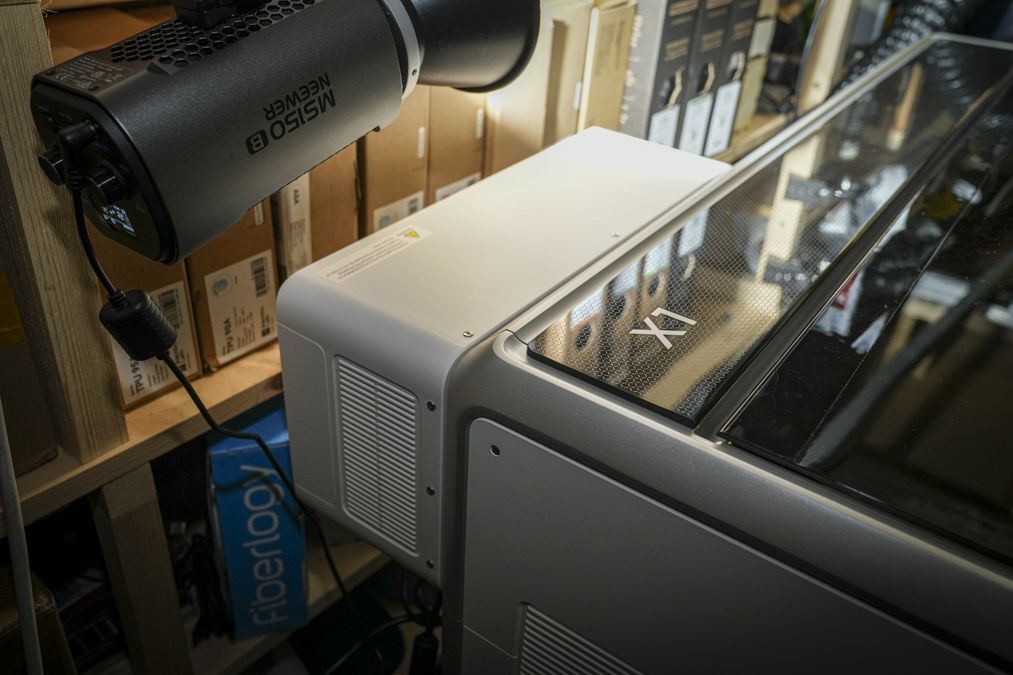
xTool supplied the 5W UV and 60W MOPA modules; these are relatively compact, just larger than a shoebox and are solidly built. Before use, they need to be installed into the back of the X1, which takes time, especially when I needed two people to move the machine into the initial position. Essentially, I should have left a little more space to access the rear.
Installation of the modules involves removing covers, connecting power and communication cables, securing the module and checking the optical path. Depending on the configuration, you’ll also need to install the appropriate optics before calibrating the system.
I installed the combined UV/Fiber/MOPA field lens, which supports the different laser sources, and found that straightforward, it essentially just screwed in. The more involved part was mounting the modules and completing the optical alignment.
Initially, I was probably a little too enthusiastic with the manual adjustments, but thankfully xTool provide a small alignment target and tape which makes the entire process relatively easy. Once I realised that small adjustments were all that was needed, the process became much easier.
The software guides you through calibration using the supplied cards, and once the source has been registered, the machine recognises it automatically. My main issue here was the physical access to the back of the machine due to space.
My workshop already has several 3D printers, laser engravers, and other equipment, so I’d originally positioned the X1 against a wall on a fixed workbench. Every time I wanted to change the rear-mounted module, I needed to move other equipment, pull out the workbench and get behind the machine. Given the X1’s size and weight, I didn’t want to attempt this alone.
As a result, what might eventually become a 15 or 20-minute module change took me closer to an hour, including moving the machine, changing the source and checking calibration, the calibration is the part that takes the time. This issue would explain why xTool also provided the optional mobile work stand, which is where this machine will be moved to once I have had a bit of a reorganisation of the space.
Being able to wheel the machine away from the wall would make installation, maintenance and module changes substantially easier. I’d also recommend planning considerably more space than the official machine footprint suggests. In my workshop, allowing roughly half a machine depth more provided the clearance needed to work comfortably behind it, mainly due to the length of the tool you need to use to screw in the bolts through each of the modules.
As I got into using the machine, a few of the safety design features are also worth noting. First, as ever, the machine came with the Air extraction unit and, in addition, the fire safety 2 unit, which was attached, but again space was limited, so it sat on a lower shelf behind the machine.
The X1 is serious workshop equipment, though far nicer-looking than the machines from a few years ago. Its size and weight are balanced by its features, and after a month of use, I highly recommend the optional workbench, which, while not essential, it will ensure you can make full use of this machine’s potential.
(Image credit: Alastair Jennings)
xTool X1: Features
The xTool X1 is unusual because many of its headline features aren’t immediately obvious. At its core, it’s a powerful 55w CO₂ laser cutter, but its modular design means that it has far more potential, and that potential can only be fully unlocked with the investment in the other modules and accessories, of which there are quite a few.
In total, the X1 supports five laser technologies, with the 55w CO2 being the only one that is provided wth the base machine. The 55W CO₂ laser can be used for cutting and engraving materials such as wood, acrylic, leather, cardboard and fabric.
Alongside the CO₂ laser, there’s the 20W diode galvo laser, which adds high-speed engraving and surface marking, particularly on wood and many other compatible materials. This module sits inside the machine alongside the CO₂ and is quick to fit; it’s also essential if you want to use any of the other three backpack laser modules.
These other models include the 5W UV laser, which can be used for engraving on glass, crystal and other delicate materials. Then there’s the 30W fibre and 60W MOPA options, which enable you to mark and engrave into metal. The MOPA adds the ability to use colour effects and deep engraving and is similar to the fibre option, but is more expensive. In this review, I’ve been supplied with four of the five available laser technologies: CO₂, diode, UV, and MOPA.
As I started the testing, the instant highlight of the features was the Hybrid Motion, as this is the one feature alongside the dual mount lasers that will make a noticeable difference to everyday project work.
Essentially, what this looks like with the lasers is that alongside the traditional gantry-based laser toolheads that move physically through the X and Y across the material, you also have the Galvo, which uses rapidly moving mirrors to direct the beam across the surface.
This means that for larger designs, Hybrid Motion moves the galvo system between regions, enabling detailed engraving over a much wider area than a conventional fixed galvo arrangement, as I tested in the F2 Ultra. When combined, you not only cover a far larger area, but the Glavo focuses on detailed engraving while the CO₂ does the cutting.
The dual tool head laser system inside is just the start of the multi-laser set, and a Laser Swap system is used to enable different styles of laser to be fitted for different projects and materials. These Laser Swap modules fit to the back with the UV, Fibre and MOPA options.
The idea here is that instead of buying additional machines, you just buy the module and fit it, cutting down on the space needed and ideally cost. Although looking at the cost of the modules, they’re almost as much as the dedicated machines.
The process of swapping the modules isn’t tool-free, and it requires access to the rear of the machine, alongside physical hardware changes and calibration checks. I personally think that this is a great feature.
However, I would have liked to see a faster change system. In this review, for instance, I swapped the modules multiple times, and it was a hassle. But then most people will inevitably settle on their laser selection rather than approaching the machine in the way that I have in this review.
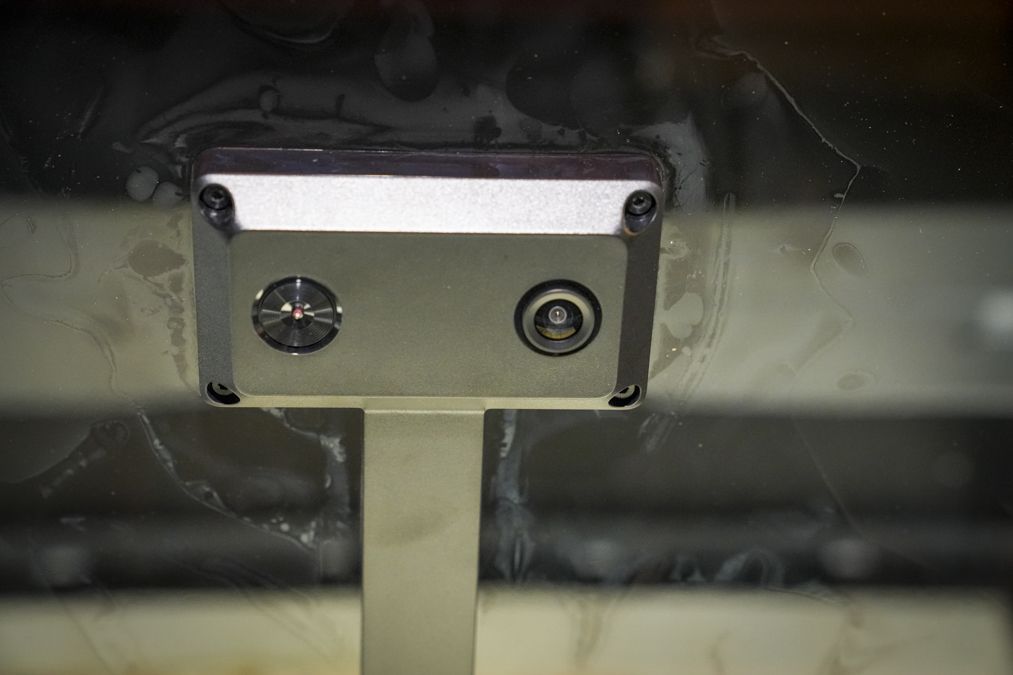
Some of the other features that really impressed during use were the close-up cameras that just help position artwork against materials, with the image appearing in the XTool software. Compared with the laser outline that we used for the full image, this is such an improvement; however, you can still click the framing preview if you prefer that way of working.
The camera system is really quite advanced, and you have the option through the xTool Studio software to change from capturing one wide-angle image, to capturing multiple sections of the workspace which are then stitched together, which helps with the accuracy of the positioning.
Although the software documentation describes automatic image capture when closing the lid, I generally triggered the capture manually during testing. Image quality from the cameras was excellent overall, although some reflective materials and darker areas could still make positioning slightly more difficult; a boost in the workshop’s lighting also helped with these previews.
Another of the big features that really stood out through the use of the machine was the automated bed adjustment. Rather than requiring constant manual focusing, the machine measures the material and adjusts the bed height as needed.
Through the test, I added a range of material thicknesses and found the process just worked; compared with the often convoluted focusing process of some other machines and the physical effort of adding a riser base, this system is just simple.
Even with slightly irregular or curved materials, the positioning system generally handled setup well, and I didn’t need to override the measurements manually.
(Image credit: Alastair Jennings)
Alongside the core accessories and in line with the xTools other machines, the X1 supports a wide range of accessories, including an automatic conveyor feeder, RA3 rotary attachment, honeycomb panel, mobile work stand, filtration, and fire safety equipment.
Throughout testing, I used xTool’s extraction and filtration setup, which is a little on the noisy side but does the job. For jobs that produce more smoke, particularly when cutting wood, I increased the extraction setting to keep the working chamber clear.
The optional Fire Safety Set Pro adds another level of protection. Installation was more involved than I’d expected, requiring the CO₂ cylinder, tubing and communication connections to be fitted before enabling the system in the software. Once configured, however, it didn’t actually require me to do anything else other than find somewhere for it to sit.
As a final point on the features, and an essential for any professional workshop, is that the machine also has an emergency stop button for quickly shutting down if needed.
xTool X1: Performance
After a month testing the xTool X1, what I realised was, that the way that I work with laser engravers normally would change with this dual laser setup. The mix of laser technologies in one machine isn’t just convenient; it means that you can select the laser technology that is best suited for the job, and often two lasers will enable a better and faster result. Most notably for me, that was the combination of the 55W CO₂ and 20W diode galvo lasers.
For most of my work, producing models, wooden components, boxes, camera accessories, and other workshop projects, these two laser systems provide an ideal combination.
The X1’s 55W CO₂ laser is excellent for all-round cutting, while the 20 diode galvo is better for detail.
To start the test, I ran through the supplied test projects before moving on to my own designs, including wooden boxes, placemats and model-making components.
Most of my work involved 3mm basswood plywood, although I also tested thicker materials up to 10mm. Across these tests, the CO₂ laser produced exceptionally clean cuts, with minimal scorching and very little need for additional finishing. The air-assist system kept the cutting path clear, while the extraction system removed smoke.
One of the most useful tests involved creating a series of 3mm plywood boxes. The accuracy was excellent, with the individual pieces fitting together cleanly without sanding or manual adjustment to the size. I could simply assemble and glue the components.
This accuracy and repeatability is something that is so important when producing models or small-batch products, where even small dimensional errors create extra work; even sanding takes time when it comes to getting the right fit. As this is a pre-production model, the usually excellent xTool Studio seemed to take most laser options down to 1, so initial models showed some scorching, however
I also tested acrylic sheets up to 10mm thick, including cutting a 3D-scanning calibration cube in half. Again, the results were impressive, with clean cuts and accurate positioning.
The machine also handled lighter materials such as paper, card, fabric, and leather without difficulty, though these need careful securing to prevent movement from airflow of the air assist and extractor.
For general cutting work, along the lines of what I use laser cutters for, the X1 matched the abilities that I have seen from other recent releases; the one point that made this slightly more exciting is that added height, which gives out-of-the-box flexibility without the need for a riser base.
The CO₂ laser provides the X1’s cutting power; the addition of the 20W diode galvo by its side for detailed engraving and speed is definitely an interesting development in the technology.
Essentially, rather than watching a conventional laser head mechanically move across every section of an image, the galvo rapidly sweeps the beam over the surface, completing relatively intricate artwork in a fraction of the time.
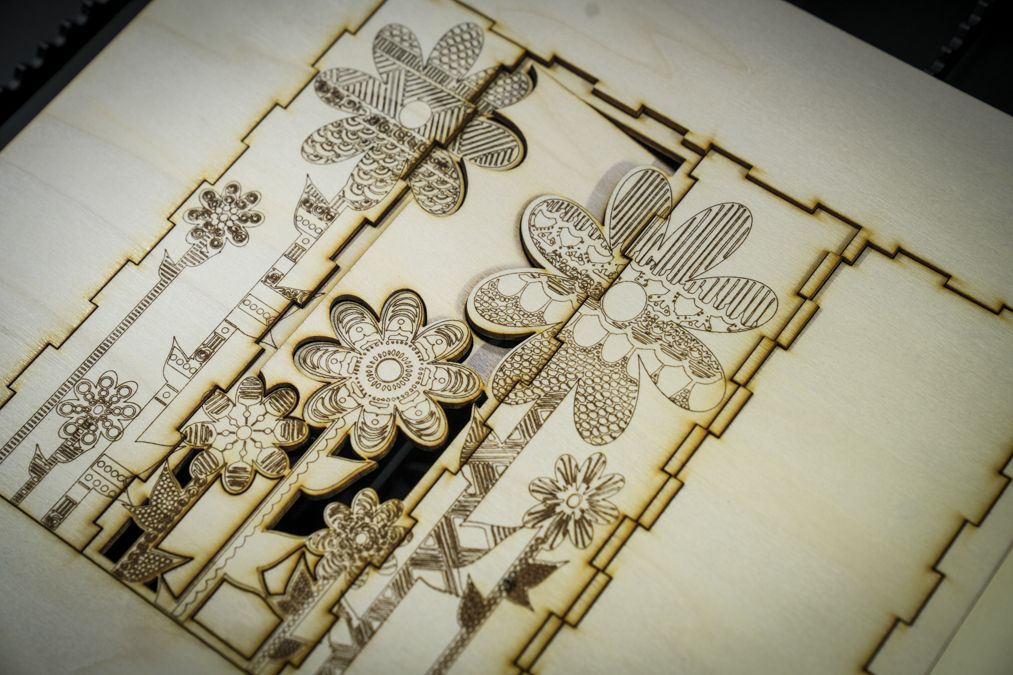
I tested it on wood, plywood, bamboo, acrylic, and coated metal samples, essentially everything in the samples box. Fine lettering was sharp and well-defined, intricate designs retained plenty of detail, and scorching was generally minimal, unless the piece that I was working on fell through the slats.
Initially, I worried the edges of the engraving might lose definition, or designs wouldn’t join up perfectly as the galvo system moved from one area to another, however the meeting of the design and the quality remained consistent.
This, however, wasn’t quite the case at the outset, and initial testing showed a few issues, but after software updates and far more accurate calibration on my part, the joins between engraving regions became almost seamless.
Photographic engraving onto wood was also impressive, although as with most laser engravers, image selection makes the biggest difference to the success.
High-contrast photographs generally produced better results than flat, low-contrast images, and I used xTool Studio’s editing tools to adjust backgrounds and improve the final output.
Personally, I still prefer the look of detailed illustrations, lettering and line-based graphics when engraved into wood rather than photo imagery.
Taking a look at one of the main test projects highlights the workflow and speed. Normally, when creating a wooden box or placemat with decorative engraving, I’ll use a single laser head that handles both engraving and cutting.
The problem is that detailed engraving can take considerably longer than cutting the outline. With the X1, I was able to assign the intricate engraving to the 20W galvo and the cutting operations to the 55W CO₂ laser.
Once configured, the software handled the transition between the installed lasers without requiring me to reposition the material or swap heads; this made a dramatic difference to processing time.
For example, I created a series of wooden placemats with detailed artwork. A comparable project on the xTool S1 took around two hours, while the X1 completed it in half an hour.
That’s an enormous improvement in speed, particularly for small businesses producing multiple products. The same was true when creating detailed pencil boxes.
Projects that would normally take 20 to 30 minutes could be completed in minutes, with the galvo handling the engraving before the CO₂ laser cut the components.
Having both lasers permanently installed makes everyday projects straightforward, and once you’ve experienced the speed of the combined workflow, returning to a conventional single-head engraver feels a little archaic.
Hybrid Motion also changes what’s practical for larger designs. In the past, I’ve avoided elaborate engraving projects at scale because the processing time was too long and I’m hopeless at lining up materials when sheets need to be matched.
With the X1, I was able to start thinking about this type of project, as the speed of the galvo would vastly reduce the time involved, especially when used alongside the conveyor accessory.
After carrying out the majority of the review using the 55W CO₂ and 20W diode galvo lasers, I then moved on to the 5w UV and 60W MOPA.
The 5W UV module opens up a very different range of possibilities, particularly for glass, crystal and delicate materials. I ran a few tests on the glass samples, along with experiments on plastic components produced on a 3D printer.
The ability to add fine surface texture to printed plastic objects is interesting, as it creates new opportunities for finishing functional parts and decorative products. I’ll admit I’m still on the experimental side of this, but will update in the near future.
The glass side of the engraving process is also something that I have struggled with in the past, and again, I wasn’t entirely successful in achieving the results I wanted.
Based on the partial results, I suspect this was more about my initial setup and approach than a fundamental limitation of the machine. Still, it’s an area that needs further investigation.
The UV module adds even more felxibility, although I’ll explore its more advanced functions in a separate addition to th ereview once I’ve reorganised my workshop to give the interchangeable modules better access.
Of the two rear-mounted laser modules, I found the 60W MOPA the most interesting. I’ve previously used MOPA machines, including the xTool F2 Ultra, so I’m familiar with their capabilities for metal engraving, embossing and colour marking.
What makes the X1 different is the ability to use similar technology within a much larger enclosed working area. I tested the MOPA on brass, stainless steel and aluminium, producing detailed markings and experimenting with relief engraving.
One of the most interesting applications involved creating apertures in thin brass sheet for pinhole cameras. I produced holes ranging from approximately 0.25mm to 0.5mm with exceptionally good results.
This is the sort of precision work I’ve previously done with dedicated MOPA systems, and it was great to see the X1 handle it so well, as it’s such a large machine I did wonder if it could handle the intricate work that I have used the F2 Ultra for.
I also experimented with engraving the aperture dimensions into the metal and cutting individual pieces from the sheet, although these more complicated processes still need further refinement.
Another highlight was engraving brass coins. While the F2 Ultra can do similar work, the X1’s larger processing area let me arrange several coins for engraving in one batch. Again, this is not a quick process; think days rather than hours.
Colour marking is another capability of the MOPA laser, though I’ve consistently found it requires considerable experimentation to get reliable results. The X1 was no exception.
I could create colour effects, but producing exactly the result I wanted across more complicated designs wasn’t always straightforward.
The take-home from the modules is that they expand the use of the machine, but those more specialist lasers require practice and experience to get the results that you would expect.
The other major part of the machine is the xTool Studio software. I’ve used the software across several generations of machines, and it’s improved substantially over time and has really become the benchmark for all others to follow.
That said if you’re new to the software then working out what type of cut and what laser is being used on what path can still be a little confusing, even with the colour coding. A text summery would be a nice quick reference before cutting.
(Image credit: Alastair Jennings)
The latest workflow is much the same as I looked at with the superb xTool M2 recently, and once you’ve completed calibration and connected the machine, preparing a project is straightforward.
Import or create the design, select the material, assign the appropriate processing operation and laser source, then send the job to the machine; after that, you generally just press the start button and wait.
As ever, the xTool Studio software offers a huge range of material presets, and unusually the material presets for the CO2 and 20w diode were way off. Especially the power and air assist, which the software set to 1 for both, easy to rectify, but possibly something to do with the pre-release software as ususally the material presets from xTool are spot on.
Adding custom materials and modifying processing parameters is also relatively straightforward once you’re familiar with the interface.
USB and Wi-Fi connectivity were both simple to set up and reliable throughout testing. Despite using pre-release software, I didn’t experience any major crashes or application-caused job failures other than a little tweaking of presets, and it all seemed pretty final, really a reflection of what I have experienced before with the addition of being able to select the laser sources.
xTool X1: Final verdict
After a month of testing, the xTool X1 is one of the most versatile laser engravers I’ve ever used, but it isn’t without its faults, although those are mostly overcome by being organised and having plenty of space.
Essentially, the base machine is an impressive 55W CO₂ laser engraver and cutter, and once you invest in the 20W diode galvo laser, you have one of the most competent machines for any small to medium-sized business on the market. The point is that with these two lasers you have the base machine that you can then build on depending on what you need to do.
Through the test, I found that that simple combination was all I really needed, and the fact that I could then attach the UV and MOPA for more specialised work all added to the versatility. However, with the 55W CO₂ and 20W diode galvo lasers installed, the machine was able to sit on the workbench without issue; it’s large but containable.
(Image credit: Alastair Jennings)
As soon as I installed the MOPA, I not only needed the additional space to mount the laser module, but it also added to the depth of the machine and for me, having the F2 for the more intricate work still made sense. While I could do the work on the X1, it didn’t necessarily mean that I would.
That aside, the pure build quality, size of the work area and depth, along with all the upgrade options, all make this one of the most substantial and complete laser engravers on the market. It is expensive, but it’s been designed in such a way that you can upgrade as and when you need.
Should you buy the xTool X1?
Value:
The base 55W CO₂ machine is well priced, specialist laser modules and accessories raise the total cost
5
Design:
Exceptional build quality for a machine of this size. Rear-mounted module changes could be easier.
4.5
Features
Support for five laser technologies, the new Hybrid Motion system offer one of the most feature packed lasers on the market
5
Performance
The combination of galvo engraving and CO₂ cutting give it an edge even before adding the other laser options
5
Total
The X1 is the most capable laser platforms I’ve reviewed, even considering its size and modular upgrade costs it’s exceptionally well balanced.
5
Buy it if…
You need versatility
The X1 combines cutting, engraving and specialist material processing within one platform, making it ideal for workshops handling varied projects.
You produce products
Its powerful CO₂ laser and fast galvo engraving system can dramatically reduce production times for personalised products and small-batch manufacturing.View Deal
Don’t buy it if…
You lack space
The substantial machine, rear-mounted laser modules and optional accessories require significantly more workshop room than the main unit’s dimensions suggest.
You need affordability
Although the base machine offers good value, specialist laser modules and accessories can quickly push up the total.View Deal